Tuesday, March 29, 2011

Pictures in Blogger

This is really a note to myself, but others who deliver HTML to Blogger instead of using the Blogger editor my find it useful.

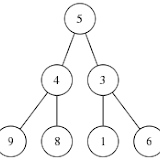
In my Simple Application of Continuations post, I showed a picture of a binary tree. When I first published the post the result looked like the figure on the left. The picture was clipped at the edges and didn't display nicely. After some experimenting, I was able to make the tree look like the picture on the right.

https://lh4.googleusercontent.com/_jFv5HG5qoIY/TYd7eKYlh8E/AAAAAAAAAHo/SLmjEF6NcjU/s160-c/BinaryTree.jpg https://lh4.googleusercontent.com/_jFv5HG5qoIY/TYd7pDQwZmI/AAAAAAAAAHo/DE4sHIbzLBQ/s800/tree.png
This problem occurs because I write my blog posts in Org-mode, export them to HTML, and pass that HTML to Blogger rather than use the Blogger editor. Normally this works well but Blogger doesn't keep embedded pictures with the post—it puts them in Picasa—so relative links won't work. Instead, I have to get a link to the picture on Picasa and put it in the org file so that the generated HTML will have the right link.

Here's how to do this.

  1. Upload the pictures to Picasa.
  2. Click on the uploaded picture. This is very important: you don't want to be looking at the thumbnail that displays after the upload. https://lh6.googleusercontent.com/_jFv5HG5qoIY/TZI4fKzDHuI/AAAAAAAAAHw/apwFwZZQdxo/s800/link-to-photo.png
  3. On the right hand side of the screen (in the gray area) you will see a link that says Link to this Photo. Click on that link and you should see something similar to what's shown here. If you don't see the check boxes and the size drop down, you didn't click on the thumbnail of the picture you're trying to link to.
  4. From the Select size drop down, pick Original size.
  5. Check the Image only (no link) box.
  6. Copy the link from the Embed image box.
  7. In your org file, place the cursor where you want the picture to appear and Use C-c C-l to insert the link.

Saturday, March 26, 2011

My Extensible Calculator

An alternative title for this post might be My Turing Complete Calculator. As I mentioned previously, I was inspired to become a Lisper after reading Paul Graham's Revenge of the Nerds. In that essay Graham mentioned that he uses the Lisp REPL as a desktop calculator. That made a lot of sense to me because I hate using a mouse to deal with the typical GUI calculator and things like bc are too hard to remember how to use unless you run them every day.

So I started using the Scheme REPL as a calculator. It was a bit of a pain to fire up Scheme every time I wanted to make some calculations but no more so than calling up bc or a GUI calculator. Then one day, for reasons long forgotten, I needed to calculate the harmonic series, Hn = 1/1 + 1/2 + 1/3 + … + 1/n, for various values of n. It suddenly occurred to me that the Scheme REPL was actually an extensible calculator in that I could add any function I wanted even if it wasn't built in. Since then, I've accumulated these functions in a scheme file that gets loaded by a script called calc. Here's the code for calc.

#! /usr/local/bin/guile
-e repl
!#
(use-modules (ice-9 readline))
(load "/Users/jcs/bin/calc.scm")
(activate-readline)
(define repl
  (lambda x ;;to disappear command line arguments
    (let ((exp (readline "calc--> ")))
      (if (or (eof-object? exp) (string=? exp "bye"))
          (format #t "bye\n")
          (begin
            (catch #t
              (lambda ()
                (format #t "~a\n" (eval (read (open-input-string exp))
                                        (interaction-environment))))
              (lambda (key . args)
                (format #t "~s: ~s\n" key args)))
              (repl))))))

The home grown REPL is there because I first did this under PLT Scheme, which had a REPL function you could call. When I switched to Guile, which doesn't have one, I just rolled my own.

The other part of the calculator is my collection of add-on functions. Here's the help function that lists those functions.

(define help
  (lambda ()
    (for-each (lambda (f) (display f) (newline))
              '("! n: n!"
                "c->f t: convert celsius to Farenheit"
                "combo m n: combination of m things n at a time"
                "coprime? n m: are n and m relatively prime?"
                "dec->hex d: convert the decimal number d to hexidecimal"
                "digits n: number of digits in the number n"
                "f->c t: convert Farenheit to celsius"
                "factor n: factor the number n"
                "fibs n: list the first n Fibonacci numbers"
                "hex->dec h: convert hex number h (#xhhhh) to decinal"
                "hn n: harmonic sum of n terms"
                "lg x: an alias for log2"
                "log2 x: logarithm base 2 of x"
                "modinv n p: find the mod p inverse of a (p prime)"
                "next-larger-prime n: find smallest prime >= n"
                "prime? n: is n prime?"
                "primes n: list the first n primes"
                "simpson f a b n: apply Simpson's rule to f between a and b"
                ))
    'Done))

Every time I find myself needing some function that I don't have, I merely code it up in Scheme and add it to calc.scm.

I can call calc from the command line, of course, but I almost never do. Instead I start it in an ansi-term under Emacs. I have that action bound to C-c c so that it's easy to pop into the calculator whenever I need it. That's especially convenient since, like most Emacs users, I always have Emacs running.

Friday, March 25, 2011

Blogging and Babel

In my last post, I included a picture of a binary tree. There's nothing surprising about that, of course. Just fire up graphviz, say, and in just a few lines you have a png image of your tree. What is surprising is that everything was done in the org file for that post.

Here is the relevant part of the previous post's org file

#+BEGIN_SRC  dot :file tree.png :cmdline -Kdot -Tpng
graph G {
size="2,3";
edge [dir=none, style=line];
node [shape=circle];
5 -- 4;
5 -- 3;
4 -- 9;
3 -- 1;
4 -- 8;
3 -- 6;
}
#+END_SRC

When I put the point inside the block between the #+BEGIN_SRC and the #+END_SRC and typed C-c C-c the code was executed producing the tree

babel-screen.jpeg

The image of the tree, which appears in the org buffer, is actually a link to the png file that dot produced, of course, and if I type C-c C-x C-v, the picture is toggled off and the link to the file is revealed.

#+results
file:tree.png

When the org file is exported to HTML, the picture is replaced by an <img …> tag.

All this is made possible by Eric Schulte's and Dan Davison's Org-babel, which is now part of the Org-mode distribution. You can find complete documentation for Babel in the Org Manual and there's a nice tutorial at the Worg page.

Babel supports a number of languages as shown on the languages page of the Babel documentation. For example, you can use ditaa to turn ASCII art into nicely rendered diagrams. This

#+BEGIN_SRC ditaa :file tunnel.png :cmdline -r -s 0.65
  +---------+                                                   +---------+
  |         |                                                   |         |
  | Host 1  +<----+                                    +------->+ Host 3  |
  | cBLU    |     |                                    |        | cYEL    |
  +---------+     |                                    |        +---------+
                  |                                    |
                  |                                    |
                  |     +--------+        +--------+   |
                  +---->+        |        |        +<--+
                        |  GW 1  +<--=--->+  GW 2  |
                  +---->+  cRED  |        |  cRED  +<--+
                  |     +--------+        +--------+   |
                  |                                    |
                  |                                    |
  +---------+     |                                    |        +---------+
  |         |     |                                    |        |         |
  | Host 2  +<----+                                    +------->+ Host 4  |
  | cBLU    |                                                   | cYEL    |
  +---------+                                                   +---------+
#+END_SRC

results in this

tunnel.png

Finally, here's an example of using gnuplot with Babel. Given this table

YearPosts
200939
201010
20119

and these gnuplot commands

#+BEGIN_SRC gnuplot :var data=posts :file bar-chart.png
set size .5, 1
set boxwidth .5 relative
set xtics 2008,1,2012
set style fill solid 1.0
plot data using 1:2 with boxes title 'Posts by Year'
#+END_SRC

We end up with

bar-chart.png

All of these examples produced pictures but Babel supports 29 languages including C, Scheme, elisp, Python, Ruby, and many others that do general computation rather than producing graphics. This is perfect for research because all the data, processing code, and final paper can be kept in a single file—the ultimate example of reproducible research.

Monday, March 21, 2011

A Simple Application of Continuations

Beginning Scheme programmers—and, indeed, even those with more experience—often have difficulty with continuations. It can be hard to get your head around the concept of continuations. Because they are so powerful and flexible, it sometimes seems as if every use must involve some heavy duty technique.

Here is a simple example that shows how to perform a return from deep within a series of recursive calls. Given a binary tree, such as that below, we want to write a function that will return the path from the root to any specified node in the tree. If the node is not found, the function should return #f.

Before we begin, we should agree on our representation for the tree. We will use the representation where each node is represented as

(value (left-subtree) (right-subtree))

Thus our sample tree is represented as

(define tr '(5 (4 (9 () ()) (8 () ())) (3 (1 () ()) (6 () ()))))

We will use the standard depth first search technique of recursing down the left subtree and then the right subtree looking for the desired node. When we find it, we would like to return the result immediately. We could do this by having our search routine pass back the path or #f at each call and then act accordingly, but the logic of the function then becomes more complicated. Instead we use call/cc to just return immediately.

 1:  ;; Return the path from the root of tree to the specified vertex
 2:  ;; Each vertex has the form (value (left-substree) (right-subtree))
 3:  (define dfs
 4:    (lambda (tree vertex)
 5:      (letrec ((dfs1 (lambda (tree path ret)
 6:                       (unless (null? tree)
 7:                         (let* ((value (car tree))
 8:                                (new-path (cons value path)))
 9:                           (if (= value vertex)
10:                               (ret (reverse new-path)))
11:                           (dfs1 (cadr tree) new-path ret)
12:                           (dfs1 (caddr tree) new-path ret))))))
13:        (call/cc
14:         (lambda (ret)
15:           (dfs1 tree '() ret)
16:           #f)                   ; lambda returns here
17:         )                       ; call/cc returns here
18:        )))

All the work is done in the dfs1 letrec. We either find the correct node and call the ret function (actually, ret is a continuation) to return the path (lines 9–10) or we recurse down the left and right subtrees (lines 11–12).

The continuation is created by the call/cc on line 13. It takes a single argument, which must be a function of a single variable. In our case, the function is the lambda function on lines 14–16. The call/cc passes the continuation to its function argument as the function's single argument. If the node isn't in the tree, dfs1 will return normally and the call/cc will return #f. If the node is found, calling the continuation causes control to pass to the end of the call/cc at line 17. I've abused the formatting a little so that the extent of the lambda function and the call/cc are clearer.

This example barely hints at the power of continuations but it does show that they can be used to solve everyday problems in an easy and natural way.

Update: Fixed typos and import of picture

Friday, March 18, 2011

The Secret of Paredit

As I mentioned previously, I celebrated the arrival of Guile 2.0 by installing Geiser. At the same time I installed Paredit. "It's fabulous;" "It's awesome;" "No lisper, regardless of preferred dialect, should even think of editing without it," they said. With praise like that, who was I to refuse? Except that I found it really hard to use. Entering code was easy and it was nice how it kept all the parentheses and quotes balanced. The problem was with making changes.

I'd start with code like

(sis)
(boom)
(bah!)

then suddenly realize that I don't want to execute that code unless do_cheers is true. I'd need to edit the code to be

(when (do_cheers)
  (sis)
  (boom)
  (bah!))

How to do that? First, I'd do what I always do: I'd put the cursor in front of (sis) and type ( but I'd end up with

()(sis)
(boom)
(bah!)

Not what I wanted. I'd check the cheat sheet and discover M-(. That sounded like just what I needed but I'd end up with

(when (do_cheers)
  (sis))
(boom)
(bah!)

If I tried to delete that last parenthesis on the second line, the cursor would just skip over it. Finally, I'd just toggle off paredit-mode and fix things up by hand.

By now you're thinking, "Geez, what a luser! Use slurpage already." I did see that on the cheat sheet but I didn't really focus on it because I read it as barfage and snarfage and to me and my coevals, snarf & barf has the specific meaning of cut and paste and that, obviously, was not what I was looking for. Eventually, I went looking on the web and found this very helpful post by Aaron Feng that showed me what to do: just put my cursor in front of (sis), type (when (do_cheers), and then C-) three times to suck the three forms into the when form. Simple when you know the secret.

I also found this informative slide show that discusses many of the features of Paredit not on the cheat sheet. It turns out, for example, that you can kill a single parenthesis.

The take away from this post is that you should learn about slurpage and barfage if you're going to use Paredit. It makes correcting your code easy and using Paredit a pleasure instead of a chore.

Monday, March 14, 2011

Dired and FTP

I maintain a Web site for our homeowners association. Mostly, this involves updating the monthly board meeting minutes, adding a pointer to them on the home page, and updating the minutes archive page. All of these pages, like this blog, are created in Emacs Org Mode and exported to HTML.

My normal procedure was to make the necessary changes to the .org files, export them to HTML, switch to a bash buffer, and call FTP at the command line to transfer the files to the hosting provider. I may or may not have remembered to clean up the HTML files and buffers when I finished. This was easy enough and only happened once a month so I never worried about whether there was a better way.

Recently, I was browsing around in Xah Lee's wonderful Emacs Tutorial and came across a page on using the shell in Emacs. On that page he mentions that you can FTP files directly from dired: just mark the files you want to transfer, press C (for copy) and when dired asks you for the destination type something like

/ftp:your-login-name@ftp-server-name:/your-directory

Thus I type something like

/ftp:jcs@hosting_service.com:/home-owners-association

Notice that second colon; you'll get a different result if you omit it.

The nice thing about this is that I'm still in the dired buffer with those files still marked so I can just type D to delete them and Emacs asks me if I want the associated buffers deleted too. I type y and all the files and buffers are cleaned up.

I'm sure I'm the last Emacs user on earth to discover all this but it's a nice way of doing that sort of thing. Anyone who does a lot a transferring of files between computers will find it a real time saver. You can use /scp: rather than /ftp: if the host you're transferring to supports it. Actually, Emacs supports several methods as described on this page of the Emacs manual.

Friday, March 11, 2011

Emacs 23.3 has been released.

Doubtless there are binaries available but I prefer to build my own. For Mac users, it's very easy to build right from the sources. First go to the Gnu Emacs Website and retrieve the tarball from Gnu.org or one of the mirrors. Untar it into a working directory and run

./configure --with-ns
make install

Then just move nextstep/Emacs.app to the applications folder. To be safe, you can rename your old emacs first so that you'll have a backup in case something went wrong with the build.

Blog Theme Tweaking

Oh, look! The Irreal blog has a new theme. Mostly, the change is about getting a little more width for code display. I liked the look of the old theme but the text area for posts was pretty narrow and I got a lot of wrapped lines for the code snippets. The new themes allow a bit more control over such matters, so I changed. Now if I could just get

pre { overflow: auto; ... }

to work everything would be fine.

I'll continue to make small tweaks as I go about personalizing the blog so don't be surprised by additional changes.

Thursday, March 10, 2011

Building Guile 2.0 on the Mac

Introduction

Guile 2.0 was just released in February so neither Fink nor MacPorts have support for it yet. There's no reason to wait, though. It's easy to build Guile from the source distribution. The only problem is that Mac OS X is missing several of the libraries that Guile needs, so they must be compiled and installed first.

In the step-by-step directions below, I have you rerun configure after each step rather than trying to compile and install all the libraries first. That's because your system may have fewer or more missing libraries than mine and rerunning configure will tell you what you need to do next.

Note that you'll need to be root or use sudo when running make install.

Step-by-step instructions

  1. Go to the Gnu Guile Web site and download the latest stable release (2.0.0 as of this writing).
  2. Untar the source into the directory where Guile will live, change into that directory and run configure. Unless you have a current Gnu multiple precision library installed, configure will return an error saying:
    Gnu MP 4.1 or greater not found, see README
    
  3. If you don't get this error, you already have Gnu MP installed; go on to step 4.

    a. Otherwise, retrieve Gnu MP from the GMP Web site. I used the latest stable release, GMP 4.3.2 but there is also a “performance release,” GMP 5.0.1.

    b. Run configure with the build option:

    ./configure --build=x86_64-apple-darwin10
    

    If you don't specify the build option, the MP library will be built for a generic x86 system and the Guile configure script will fail again with the same error. If x86_64-apple-darwin10 does not describe your system, check the Guile config.log file to see what it's expecting.

    c. Run make check. This will exercise the library and make sure everything was built correctly.

    d. Run make install

  4. Change back to the Guile directory and rerun configure. The next error will tell you the next missing library. I got
    configure: error: GNU libunistring is required, please install it.
    

    a. Retrieve libunistring from the libunistring Web site and untar it into a working directory.

    b. Do the usual configure / make / make install dance to make and install the library.

  5. Return to the Guile directory and rerun configure. This time configure will complain about a missing pkg-config script. If you don't get this error go on to step 6.

    a. Retrieve pkg-script from the pkg-config Wiki.

    b. Untar it into a working directory and run configure / make / make install.

  6. Return to the Guile directory and rerun configure. This time configure will complain about a missing libffi. If you did not get this error, go on to step 7.

    a. Retrieve the library from the libffi Web site.

    b. Untar the library into a working directory and run configure / make / make install.

  7. Return to the Guile directory and rerun configure. The configure script will complain about a missing BDW-gc library.

    a. Go to http://www.hpl.hp.com/personal/Hans_Boehm/gc/gc_source/ and down load the source for Version 7.1. Note that the stable version does not compile on the Mac.

    b. Untar the source into a working directory and do the usual configure / make / make check / make install. At some point (either during the make or the make check you might get an error complaining that the ucontext routines are deprecated and that you need to specify _XOPEN_SOURCE. I did this by editing the source for mach_dep.c and including the statement

    #define _XOPEN_SOURCE
    

    right before the

    #include <ucontext.h>
    
  8. Return to the Guile directory and rerun configure. This time configure should finish normally and you can try compiling Guile. If you get an error about the missing symbol _rl_get_keymap_name, you will need to go to the readline library Web page and get the latest version of the library. Before you build the library, delete or rename the libreadline that is in /usr/lib. That version of the library is the BSD version supplied by Apple and is no longer compatible. Then build and install the new libreadline with the usual configure / make / make install. Return to the Guile directory and run make clean. Then rerun the make. If you don't run the make clean Guile may sigfault when you try to run it. Check out your build by running make check and then do the make install. At this point you should have a working version of Guile 2.0.

Saturday, March 5, 2011

Geiser

Having installed Guile 2.0, I was finally able to try out Geiser. For those who came in late, Geiser is an Emacs mode that provides a Slime-like IDE for Scheme. I've been yearning for something like Geiser for a long time. As I explained in Dragged kicking and screaming to Emacs (Pt. 1) (Pt. 2), I moved from being a lifelong Vi user to Emacs specifically to have a comfortable Lisp/Scheme hacking environment. Slime fills the bill nicely for CL, but until Geiser there was nothing as nice for Guile, my preferred Scheme dialect.

Here are some of the features of Geiser taken from the on-line documentation:

  • Form evaluation in the context of the current file's module
  • Macro expansion
  • File/module loading and/or compilation
  • Namespace-aware identifier completion (including local bindings, names visible in the current module, and module names)
  • Autodoc: the echo area shows information about the signature of the procedure/macro around the point automatically
  • Jump to definition of identifier at point
  • Access to documentation (including docstrings when the implementation supports it)
  • Listings of identifiers exported by a given module
  • Listings of callers/callees of procedures
  • Rudimentary support for debugging (when the REPL provides a debugger [which Guile does, of course —jcs ]) and error navigation
  • Support for multiple, simultaneous REPLs

Another useful feature is that Geiser starts automatically as soon as you enter a scheme buffer. You can then evaluate whatever portion of the buffer you like and a quick C-c C-z pops you into the REPL—very nice.

I've just started playing around with Geiser but so far everything looks well done. The only problem I've found is that Geiser does not load the .guile file and there isn't any way of making it do so. The idea is that you should use the .guile-geiser file instead, but that doesn't work for me. That's presumably because my .guile loads a reasonably complex environment including my version of autoload functions. I was able to work around this problem by putting a local copy of geiser-guile.el in my init.el file after the form loading geiser. In this copy, I removed the -q switch in the geiser-guile--parameters function by replacing the line

"-q" "-L" ,(expand-file-name "guile/" geiser-scheme-dir)

with the line

"-L" ,(expand-file-name "guile/" geiser-scheme-dir)

I wrote and submitted a patch to allow the -q switch to be a configuration option, so perhaps the problem will go away in future versions.

If you're a Guile user, Geiser is well worth trying out. I think it's better than anything else that's available for Guile.

Update: Fixed broken links
Update 2: The newest version of Geiser now supports loading .guile

Wednesday, March 2, 2011

Guile 2.0.0

After 3 years of work, Guile 2.0.0 was released on February 16, 2011. I have it up and running on my iMac and it appears to be an excellent Scheme implementation. It has a new compiler and associated VM that work seamlessly. See the News file for a list of all the new goodies.

The Gentoo port isn't out yet and I don't use any of the Mac package handlers so I had to build it from scratch. That wouldn't be difficult except that many of the necessary libraries are missing on the Mac. I'll write up and post some notes on how to get it running on the Mac. Other systems will be similar but probably easier. If you're willing to wait for the packages, it should be a breeze.

region-or-buffer (revisited)

In Writing Emacs Commands That Work on Regions or the Entire Buffer I blogged about an Emacs macro (with-region-or-buffer) that I use to allow my Emacs commands to work on the current region if one exists or the entire buffer if not. I've been using that macro for some time now and it works perfectly for me. It probably works perfectly for almost everyone but there is an edge case: It implicitly assumes that transient-mark-mode is set. I've always set it explicitly in my .emacs file and as of Emacs 23 it's on by default. There are occasions, however, when one might want to have it off (see Fixing the Mark Commands in Transient Mark Mode for some examples and work arounds in the Mastering Emacs blog).

This came to my attention while I was browsing in Xah Lee's excellent Emacs Blog. He recommends using the function region-active-p, which is merely (and transient-mark-mode mark-active). That takes care of the edge case and for the sake of portability I decided to update with-region-or-buffer to use it. In the process of doing that update, however, I discovered that the recommended solution is to use use-region-p, which asks the additional question of whether the region is empty and use-empty-active-region is nil. Since there's no point in acting on an empty region, using this predicate will cause the action to be applied to the whole buffer instead.

With this in mind, the with-region-or-buffer macro is now

(defmacro with-region-or-buffer (args &rest body)
  "Execute BODY with BEG and END bound to the beginning and end of the
current region if one exists or the current buffer if not.
This macro replaces similar code using (interactive \"r\"), which
can fail when there is no mark set.

\(fn (BEG END) BODY...)"
  `(let ((,(car args) (if (use-region-p) (region-beginning) (point-min)))
         (,(cadr args) (if (use-region-p) (region-end) (point-max))))
     ,@body))